How to Scramble Eggs {Egg Cookery 101}

It’s time for installment No. 2 of Egg Cookery 101, and it seemed to me that the next preparation to tackle was incontestable.  

The scrambled egg. 

How to Scramble Eggs {Pedantic Foodie}

There are many ways to scramble an egg, and no doubt, many of them produce satisfactory results.  But, for my favorite scrambled egg there is only one path to triumph, and this is it. 

How to Scramble Eggs {Pedantic Foodie}

Narcissistic?  Perhaps, but I am not claiming that my permutation of the humble scrambled egg is the best.  After all, there is no question that many a fine egg has been scrambled in a myriad of ways differing from my personal method.  Therefore, I claim only that it is my favorite method, and I would wager it will soon be yours as well.  

So yes, it’s kind of the best.
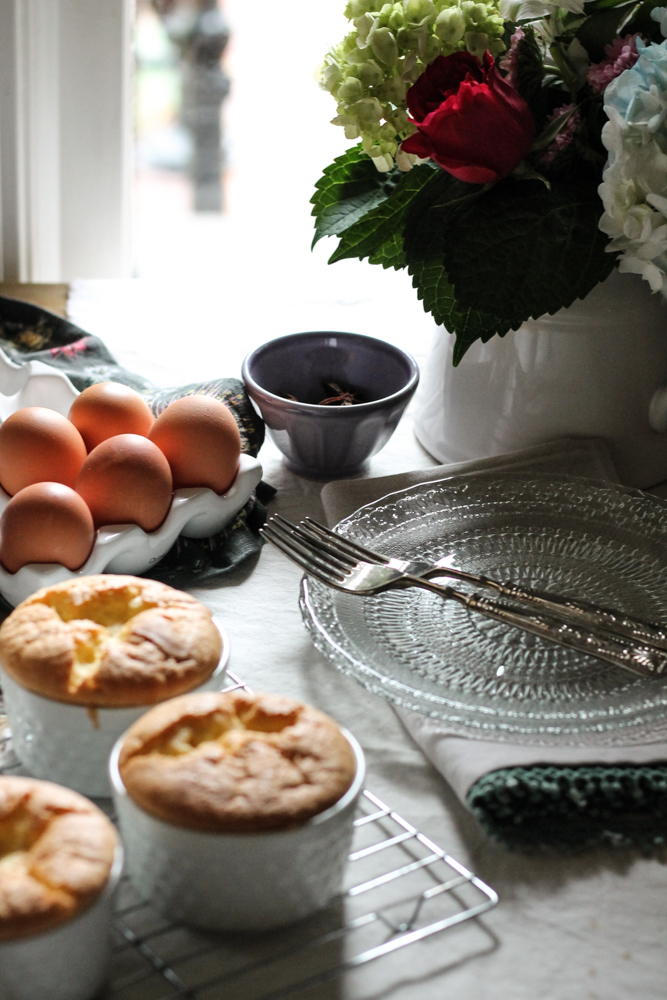
How to Scramble Eggs {Pedantic Foodie}

Step One: The eggs.  

How to Scramble Eggs {Pedantic Foodie}

Fresh and cracked. 

How to Scramble Eggs {Pedantic Foodie}

The second step requires a bit more consideration. 

How to Scramble Eggs {Pedantic Foodie}

As a rule, I never whisk eggs with an actual whisk, and that is because I believe they tend to over-mix the eggs.  Several good mixes with a fork is all you need.  We are really just trying to break up the yolks and whites.  We do not want to achieve homogenization here.

How to Scramble Eggs {Pedantic Foodie}

Step Three: Cream; one heavy splash. 

Step Four: Salt; lightly sprinkled. 

How to Scramble Eggs {Pedantic Foodie}

The one factor I consider to be completely uncompromisable is the heat.  It must be medium.  High heat is for boiling water, not for creating a something light and airy.  If your stovetop tends to run a little hot, turn the heat down a bit more.  There should be no browning happening in the egg pan. 

I always let my butter melt completely and add my eggs only when it has begun to bubble.  Then, I allow the eggs to sit for one minute before I touch them.  Yes, one whole minute.  Set your timer.  This gives the eggs a chance to cook roughly one-half of the way.  

How to Scramble Eggs {Pedantic Foodie}

After the minute has passed, take a spoon or spatula, and gently fold the eggs over themselves and gently break them up so that all areas cook evenly.  Do not beat them, just gently move them around until they are just about to where you like them,* and remove the pan from the heat.  Taking the eggs off of the heat a bit prematurely is essential, as they will always set a bit more after you get them on your plate. 

*For me, this only takes one minute or just under. 

How to Scramble Eggs {Pedantic Foodie}

There you have it.  My favorite scrambled egg, that I hope will soon become yours. 

This concludes lesson two of Egg Cookery 101, a class taught by someone classically trained over many hours of half-awake breakfast preparation.  Super fancy. 

Sincerely, 

Pedantic Foodie

Pineapple & Star Anise Upside Down Chiffon Cakes

We are almost able to take that big sigh of relief because the dreaded, yet unavoidable season of confounding forms, evanescent deductions, and really bad headaches will shortly be behind us.  A goodbye this tremendous begs to be celebrated.  There is only one proper way to celebrate, and that is with cake. 

Pineapple & Star Anise Upside Down Chiffon Cakes {Pedantic Foodie}

My immense fondness for cake is no secret.  Cupcakes are a particular favorite with me.  One morning, in the depths of hunger (I had probably eaten two hours before, but that is neither here nor there), I decided that pineapple would be a pleasing partner for that oversized stock of star anise that I had been hoarding for months. 

Pineapple & Star Anise Upside Down Chiffon Cakes {Pedantic Foodie}

Anise is a tricky spice to tackle.  Subtle is her sweet spot - she’s the backup dancer of your spice cabinet.  Though she does not possess the grace to carry off the leading role, she will spin intriguing, unobtrusive circles around your star ingredient, transforming that which was already good. 

Pineapple & Star Anise Upside Down Chiffon Cakes {Pedantic Foodie}

Stop thinking about black jelly beans.  I caught you.  This is nothing like that.  Unlike those audacious “punch you in the face with my flavor” black beans of horror, the anise in this application is like a satin curtain, softly cascading over the sweet, acidic pineapple.  It playfully bounces about your palate in perfect harmony with the tangy fruit.  

Pineapple & Star Anise Upside Down Chiffon Cakes {Pedantic Foodie}

So… Even if you, like myself, do not like anise AT ALL, there is no need to shy away from these humble celebratory cakes. 

Pineapple & Star Anise Upside Down Chiffon Cakes {Pedantic Foodie}

Oh, did I mention that my brother loves black jelly beans?  Red flag if I ever saw one. 

Pineapple & Star Anise Upside Down Chiffon Cakes {Pedantic Foodie}

I have always taken slight issue with the pervasive 1950s southern delicacy that is pineapple upside down cake.  The cloyingly sweet caramel combined with a dense, butter-fattened cake is just too rich for me to enjoy past two or three bites.  

Pineapple & Star Anise Upside Down Chiffon Cakes {Pedantic Foodie}

In an attempt to lighten things, I went with a chiffon cake.  It is lifted with egg whites and fattened with oil, both of which produce an all around airier cake that is reminiscent of an angel food cake.

If you realize halfway through preparing your mis en place that you are out of cake flour, you can use our friend, Joy the Baker's cake flour substitute .  It works like a charm, and thank goodness because, I’m really bad at buying cake flour.  

Pineapple & Star Anise Upside Down Chiffon Cakes {Pedantic Foodie}

Though these tiny treats make a smashing dessert, they would also make very nice company for your morning cup of restoration, also known as coffee. 

I topped my warm cakes with a bit of whipped cream that I had sweetened with a drizzle of Turkish honey, and I really enjoyed the subtle floral notes it added.  

Pineapple & Star Anise Upside Down Chiffon Cakes {Pedantic Foodie}

Remember to always flip with confidence and garnish with more whipped cream than what is considered socially appropriate.  It’s Wednesday, live it well. 

Pineapple & Star Anise Upside Down Chiffon Cakes {Pedantic Foodie}

Sincerely, 

Pedantic Foodie


Pineapple & Star Anise Upside Down Chiffon Cakes with Honey Whipped Cream

makes 4, 3.5 ounce ramekins / recipe adapted slightly from Alton Brown

- 4 tablespoons unsalted butter 

- 1/4 cup brown sugar 

- 3/8 teaspoon kosher salt, divided use 

- 1/4 teaspoon freshly ground star anise

- 1 cup fresh pineapple, cut into 1/4-inch cubes

- 2 3/4 ounces cake flour 

- 3/4 teaspoon baking powder 

- 3 eggs 

- 3 ounces granulated sugar, divided use 

- 2 tablespoons water 

- 2 tablespoons vegetable oil

- 1 teaspoon vanilla extract 

- 2 tablespoons fresh orange juice 

- 3/8 teaspoons cream of tartar 

- 1/3 cup heavy whipping cream

- 1 tablespoons honey 

Preheat oven to 325 degrees. 

In a small skillet, melt butter over medium heat.  When the butter has melted, stir in brown sugar, 1/8 teaspoon kosher salt, and ground anise.  Cook for 2-3 minutes, until the caramel is bubbling and has thickened slightly.  Remove from heat and stir in pineapple.  Divide the mixture evenly amongst the four ramekins.  Allow to cool while you prepare the cake batter. 

Sift to combine cake flour, baking powder, and remaining 1/4 teaspoon salt; set aside. 

Separate egg yolks from egg whites.  In a large bowl combine yolks and 2 ounces sugar.  Beat on medium speed with an electric mixer for 2 minutes, or until the yolks have lightened in color and have become somewhat thick.  Slowly beat in water, vegetable oil, vanilla, and orange juice.  Gently whisk in flour mixture until just combined.  Set aside while you prepare the egg whites. 

In a clean bowl, combine egg whites and cream of tartar, beat on high speed until the whites become thick and foamy.  Reduce the speed to medium and gradually add in remaining 1 ounce of sugar.  Increase speed to high and beat until stiff peaks form; about 2 minutes. 

Add 1/3 of the egg white mixture to the batter and whisk until well combined.  Gently fold in remaining egg whites, until just incorporated.  Divide the batter evenly among the ramekins. You may have some batter leftover.  

Place the ramekins on a baking sheet and bake for 30 minutes, or until the tops are golden and a skewer inserted in the center comes out clean.  While the cakes are cooling, prepare the whipped cream. 

Combine cream and honey in a medium bowl and beat on high speed until soft peaks form.  Set aside until ready to use. 

Allow the cakes to cool for 20 minutes and then run a butter knife along the edges to loosen each cake and flip over quickly.  Serve with whipped cream.  Enjoy! 


You may also like...

Savory Lemon & Chive Cheesecake

There’s a chill in the air - a promising, elusively familiar chill that somehow promises more warmth than the sunshine itself.  My red-lacquered toes clad in premature sandals turn purple, a light sweater would be better replaced by a legitimate jacket, but still we go on, wearing our linen dresses and flip-flops, because that morning chill is full of promise.  The promise of what we know is coming. 

The warmth of Spring is all but in reach and that lingering chill is not so bitter as it once was.

Savory Lemon & Chive Cheesecake {Pedantic Foodie}

Life is a lot about giving up one wonderful choice, for what we hope will be a slightly more wonderful choice.  Sometimes it’s voluntary.  Sometimes we are forced into it and we have to take a few deep breaths to realize that everything we dreamed of may no longer be the best course of action.  Sometimes it’s a bitter exchange, but one that we know is necessary. 

Savory Lemon & Chive Cheesecake {Pedantic Foodie}

During these Spring months, we bravely endure the cold toes and purple feet because we know that in several hours the Sun will peek her head through the budding trees and our fashion choices will once again seem reasonable.  Just as with life, April is full of cold toes that turn into beautiful days.  

Savory Lemon & Chive Cheesecake {Pedantic Foodie}

This cheesecake has nothing to do with hard choices, but it has a lot to do with Spring.  It’s radiant with the bright, fresh-from-the-garden flavors I so adore this time of year. 

Savory Lemon & Chive Cheesecake {Pedantic Foodie}

Though it is called a cheesecake, this is not a dish you would likely enjoy slicing and eating on its own.  This "cake" is more of a spread, best enjoyed with your favorite crackers.  

Savory Lemon & Chive Cheesecake {Pedantic Foodie}

Shall we take a moment to appreciate how adorable this 4-inch springform is?  It’s been in my cabinet forever and I finally found the perfect use. 

Savory Lemon & Chive Cheesecake {Pedantic Foodie}

Appetizers are one of my favorite things.  Eating before I actually eat has never lost its childlike appeal for me.

This cheesecake makes a lovely pre-meal snack and is a welcome revision of the ubiquitous cheeseball. 

Savory Lemon & Chive Cheesecake {Pedantic Foodie}

While I absolutely, positively hate doing this… I’m going to make you do the whole water bath thing.  I know it’s annoying, and I’m sorry, BUT, you will not enjoy this cheesecake half so much if you skip this step.  Believe me, I tested it both ways.  

Fortunately, a bit of sturdy tin foil will keep us from suffering too much heartache, and the seamlessly smooth texture is completely worth that extra effort.

Savory Lemon & Chive Cheesecake {Pedantic Foodie}

This creamy, gentle onion and slightly acidic melody is everything.  We are basically eating the farmer’s market on a cracker. 

Savory Lemon & Chive Cheesecake {Pedantic Foodie}

Life will keep giving us hard choices, but in the kitchen we are not called to compromise.  

Savory Lemon & Chive Cheesecake {Pedantic Foodie}

Spring is calling, purple toes and all.  Let’s live it. 

Sincerely, 

Pedantic Foodie


Savory Lemon & Chive Cheesecake

serves 4-6 / recipe adapted from Giada De Laurentiis

- 1/4 cup ricotta cheese 

- 2 ounces cream cheese, at room temperature

- 3 tablespoons goat cheese

- 1 tablespoon pecorino romano 

- 1/2 tablespoon granulated sugar 

- 1/4 cup chives, finely chopped

- 1 tablespoon freshly squeezed lemon juice

- 1 teaspoon lemon zest 

- 1 egg yolk 

- olive oil, for greasing 

- 1/4 cup toasted pistachios, finely chopped

Preheat oven to 350 degrees. 

Combine all ingredients in the work bowl of your food processor and pulse until smooth.  

Grease a 4-inch springform pan with olive oil and pour in the cheesecake mixture.  Wrap the outside of the pan tightly with a sturdy piece of aluminum foil.  

Place the pan in the center of a pie plate and fill the plate with warm water, until it comes half-way up the sides of the springform pan. 

Bake for 30-35 minutes, or until the edges are golden and the center of the cake still moves slightly when the pan is gently shaken.  Turn off the oven and keep the oven door ajar.  Allow the cake to cool for one hour, then remove from the water bath.  Remove the aluminum foil and cover with plastic wrap.  Refrigerate for 2-3 hours, or until cool.  

When the cake has cooled, run a butter knife along the edges to loosen the cake and then remove from the springform pan.  The edges will be soft and somewhat sticky.  Gently press the finely chopped pistachios against the sides of the cake to form a rough crust.  This cake is best when served cool, but not cold, so set it out 15-20 minutes before you plan on serving it.   Enjoy!