Lemon Poppyseed Madeleines [ a Christmas gift and a block of butter ]

The pan has been tucked away in a corner cabinet for over four months, silently beckoning me to delve into a recipe so highly esteemed that my far-from-French fingers recoiled at the thought. 

Lemon Poppyseed Madeleines {Pedantic Foodie}

Madeleine: noun /ˈma-də-lən, ˌma-də-ˈlān/  

"a small, rich, shell-shaped cake" 

Though the Webster's definition rings of simplicity, I knew the approbation that surrounds these precious, buttery cakes, and tackling them was not something I could take lightly.

Lemon Poppyseed Madeleines {Pedantic Foodie}

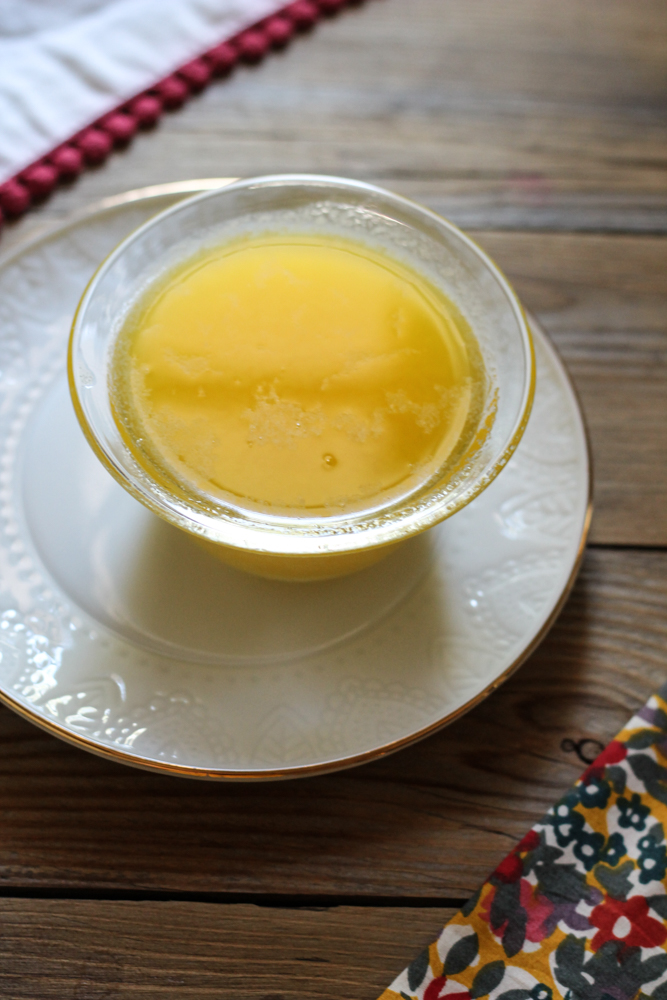
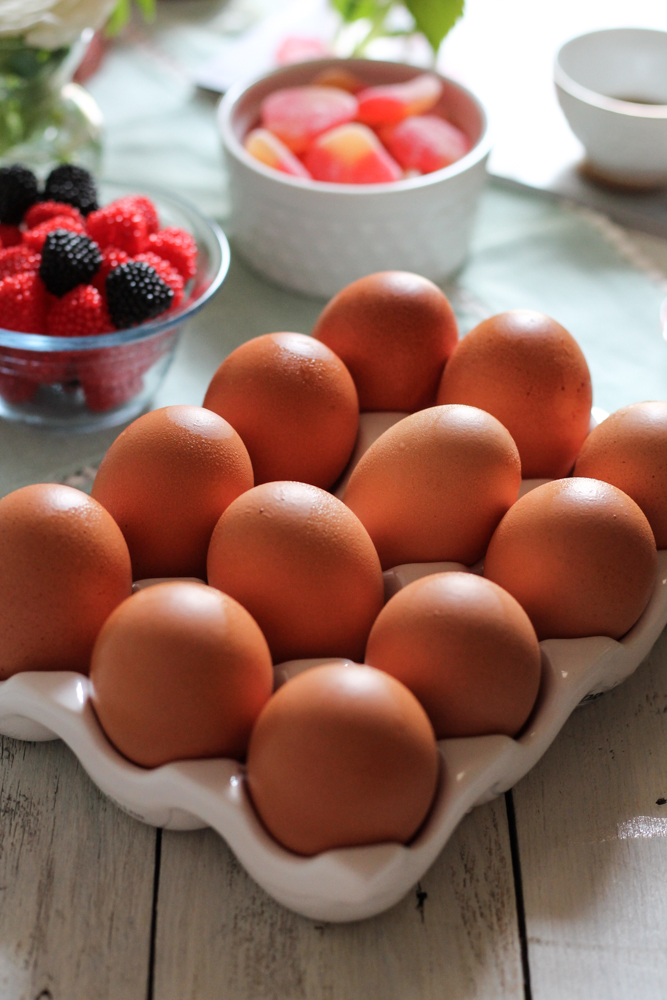
With the pan already in my possession, my first pursuit was the butter.  Clearly, it needed to be good butter, it only made sense that great madeleines would come from great butter. 

Lemon Poppyseed Madeleines {Pedantic Foodie}

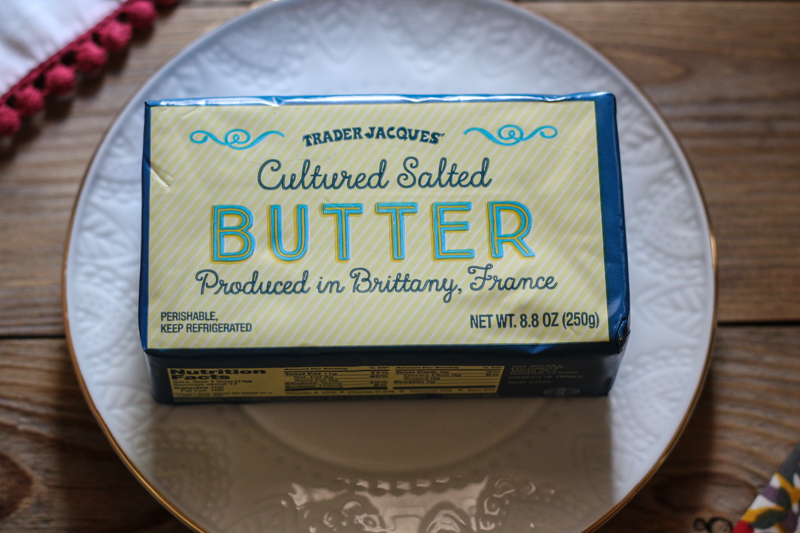
This is my favorite butter I have ever brought into my home.  I really, really love it.  I have unashamedly run my fingers across it's creamy, yellow surface and enjoyed it plain more than once.  

I know, I would have said that was disgusting too...until I tried it.  

While I do not waste it on toast or in chocolate-packed cookies, if I have a recipe where fat is the star, I turn to this.  It is so rich and flavorful, and it smells heavenly.  It is what butter is meant to be. 

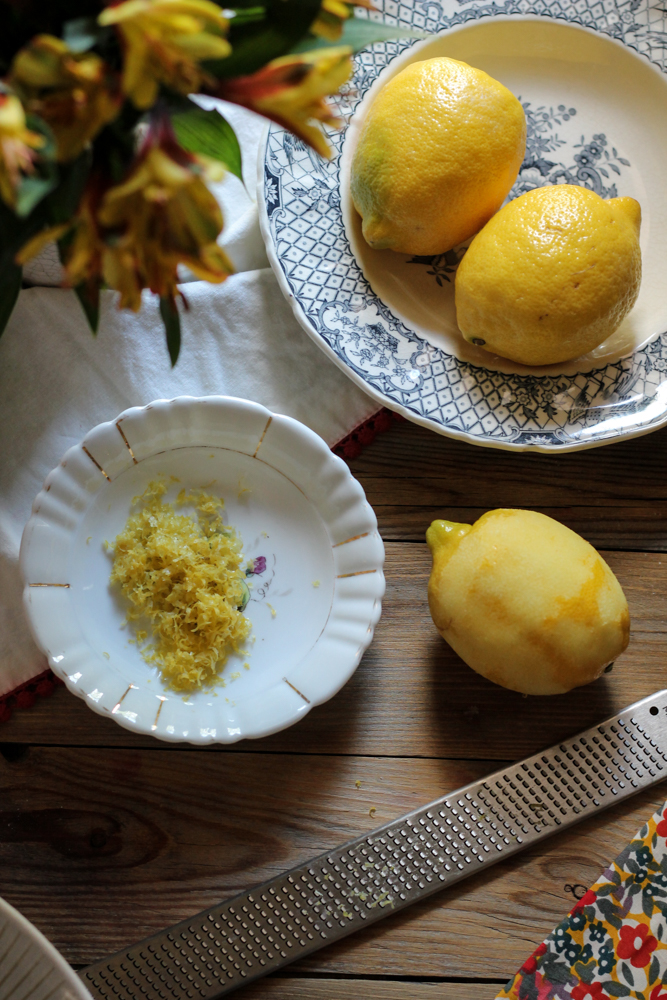
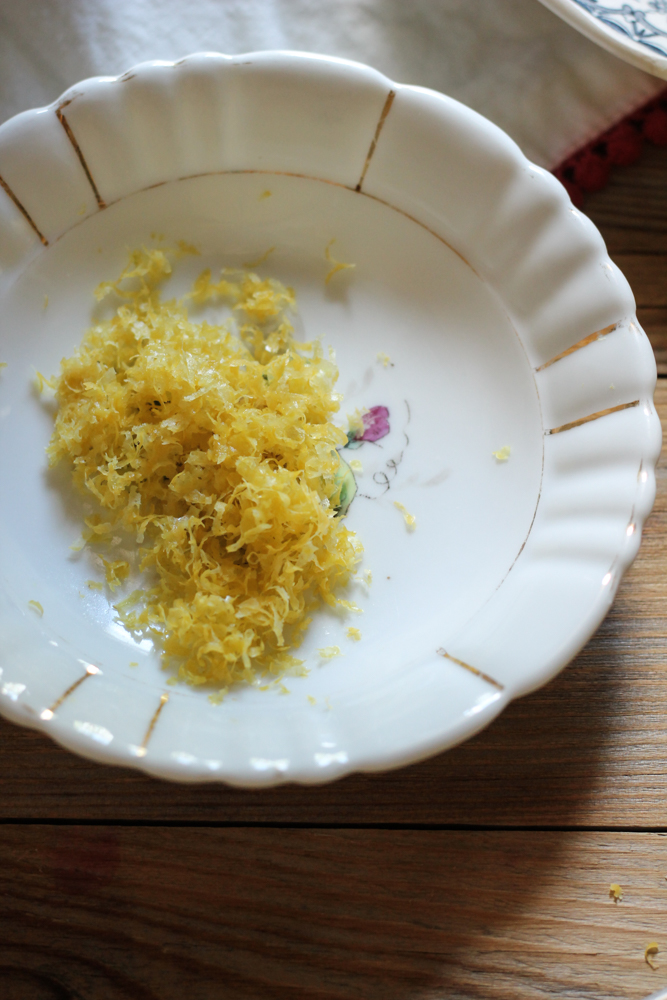
Though I could have tortured many a tradition-loving frenchman by adulterating these tiny cakes with a myriad of flavors, I knew that simplicity was my friend here, so I opted for a simple combination of lemon zest and poppy seeds.  

Lemon Poppyseed Madeleines {Pedantic Foodie}

Before tackling these recipe, I did my research, and finally looked to none other than the wizard of French cuisine, David Lebovitz , for guidance. 

I was after a buttery cake with a crisp exterior, a soft, sponge-like interior, and a prominent humped back.  How hard could it be?  Not as hard as I had anticipated, actually. 

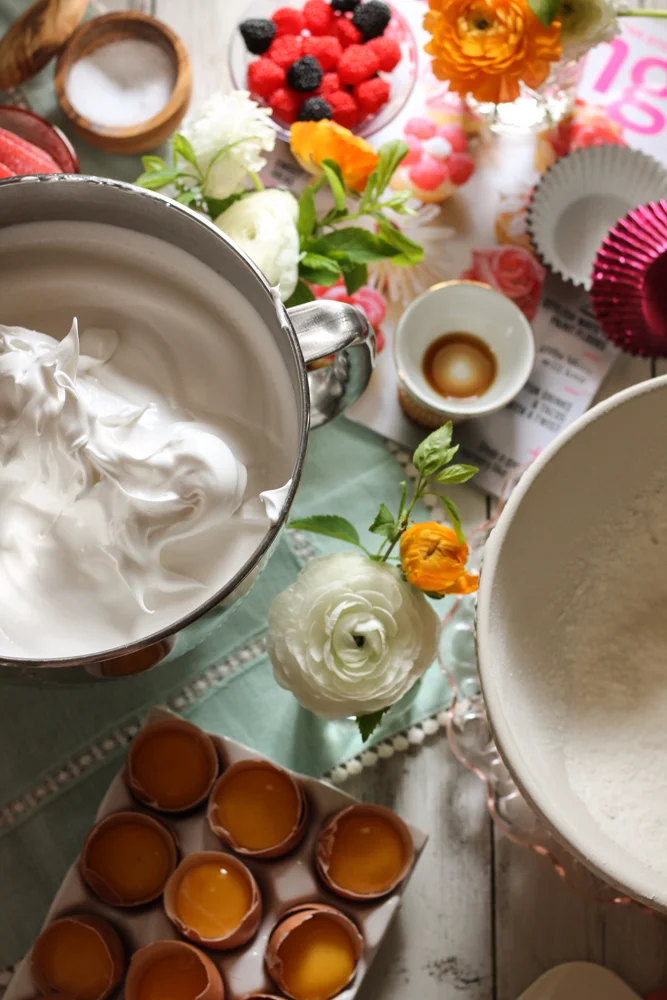
Egg yolks are whipped with sugar and a pinch of salt until they become thick and airy, and then flour is sifted over the mixture in several additions. 

Lemon Poppyseed Madeleines {Pedantic Foodie}

While David recommended adding baking powder, I decided to let my eggs do all the work of rising these tiny cakes, and they still puffed up beautifully.  

I did however, take his suggestion and freeze my pan after I had prepared it with a heavy coating of melted butter and a dusting of flour.  This helped significantly with achieving the classic humped shape.  

Lemon Poppyseed Madeleines {Pedantic Foodie}

Since I only have one pan, and this recipe makes two dozen madeleines, I had to bake them in two batches. After baking the first batch, I did not return the pan to the freezer, but rather baked the second round in a warm pan and the hump was significantly smaller. 

Lemon Poppyseed Madeleines {Pedantic Foodie}

To be perfectly honest, I preferred the appearance of the second batch, though I suppose that will negate all my exaggerated claims at a French heritage.  

I was actually a bit annoyed with my humped cakes until, upon further investigation, I realized that the "puffy" shape is highly prized.  It was one of those happy "oops, but not really" moments. 

Lemon Poppyseed Madeleines {Pedantic Foodie}

There is never shame in a good glaze.  Especially if it's a lemon glaze - oh yes.

Lemon Poppyseed Madeleines {Pedantic Foodie}

Lemon juice, confectioner's sugar, and a bit of whisking is all that this simple coating requires. 

Lemon Poppyseed Madeleines {Pedantic Foodie}

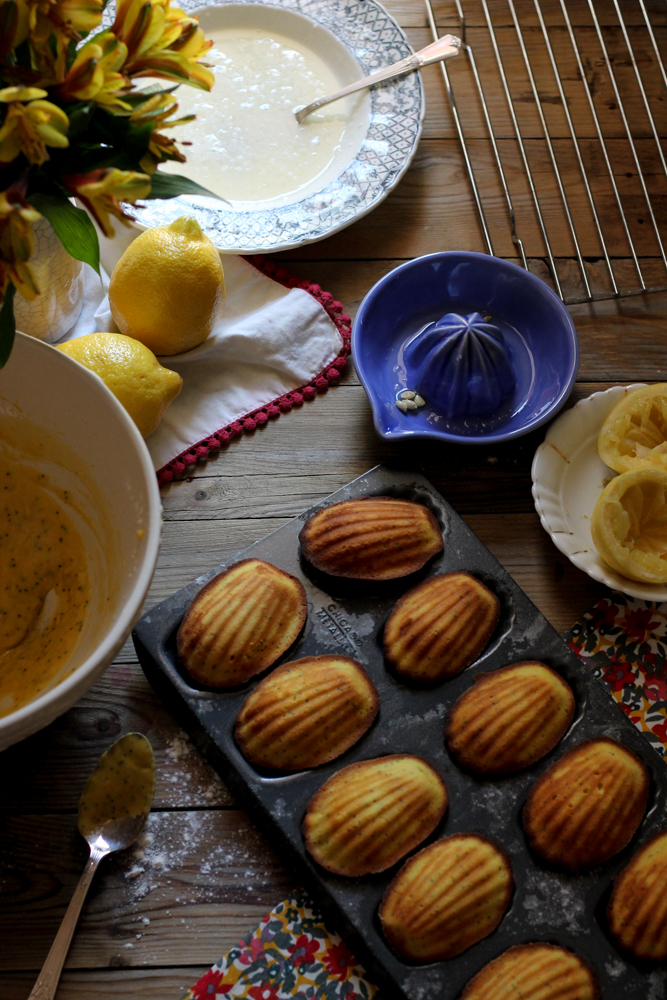
Crisp, warm, and ready to be dunked.  Are not they lovely? 

Lemon Poppyseed Madeleines {Pedantic Foodie}

The hardest part is choosing whether to enjoy them with coffee or tea.  For me, the choice was simple.  Earl Grey and lemon pair so perfectly. 

Lemon Poppyseed Madeleines {Pedantic Foodie}

Another daunting endeavor conquered, another block of butter gone...it was a good day. 

Sincerely, 

Pedantic Foodie


Lemon Poppy Seed Madeleines 

makes 24 / recipe adapted from David Lebovitz

for the cakes

- 3 large eggs 

- 2/3 cup granulated sugar 

- pinch of salt 

- 1 1/4 cups all-purpose flour 

- 2 teaspoons poppy seeds

- zest of one lemon

- 9 tablespoons unsalted butter, melted and cooled to room temperature (plus extra for greasing the pan)

Brush your madeleine pan with melted butter.  Dust lightly with flour, and then tap off any excess.  Place the pan in the freezer while you prepare the batter.

In a large bowl, combine eggs, granulated sugar, and salt.  Beat on high speed for five minutes, until the mixture is thick, frothy, and light yellow in color. 

Sift 1/3 of the flour over the egg mixture and gently fold it in using a spatula.  Repeat twice more, adding 1/3 of the flour each time.  

Combine poppy seeds, lemon zest, and cooled, melted butter. 

Slowly drizzle the butter mixture into the batter, a little at a time, while folding to mix in the butter.  Fold just until the butter is fully incorporated. 

Cover the bowl with plastic wrap and refrigerate for one hour. 

Preheat the oven to 425 degrees. 

Use a large tablespoon to portion out the batter, filling each indentation about 3/4 of the way full.  Do not spread the batter. 

Bake for 7-9 minutes or until the cakes are golden and spring back when touched lightly.

While the cakes are baking, prepare the glaze. 

for the glaze

- 3/4 cup confectioner’s sugar, sifted 

- 3 tablespoons lemon juice

Whisk together confectioner’s sugar and lemon juice until smooth.  

As soon as the cakes are cool enough to touch, dip them into the glaze and then place on a cooling rack to set.  Store in airtight containers for up to three days. 

Enjoy! 

If you do not have two pans, you’ll have to bake your madeleines in two batches.  As soon as you have removed the first batch of madeleines from the pan, wash and then grease and flour again.  Place the pan in the freezer for 15-20 minutes, until chilled.


You may also like... 

Floral Cupcakes {Angel Food + Lemon Marshmallow Frosting}

Saturday morning.  Unabashedly unfeminine fishing hat - check.  Mini Mouse rod - check.  Tiny tackle box - check.  A sleeping mama, an anxious father, and a very happy little girl.  Only one thing stood between us and a day on the water - our traditional and obligatory 7-11 stop. 

Angel Food Cupcakes with Candy Flowers {Pedantic Foodie}

My father and I went on many a fishing trip, and though the memories are hazy, their merry glow is timeless.  

Before every trip, one stop had to be made.  Though my mother was very capable of packing us lunches, and she always did, we could not forgo our chance to buy two Gatorades (Blue only please, the yellow was repulsive), a donut or two, and a bag of peach rings...which likely ended up shoved unto each of my grimy little fingers later that afternoon. 

Angel Food Cupcakes with Candy Flowers {Pedantic Foodie}

Though my father and I have not made a 7-11 trip in quite some time, my love for days with him or for peach-flavored candy has not diminished in the least. 

When this month's edition of Martha Stewart Living showed up at my door several weeks ago, the tiny girl inside of me wanted to scream with giddy elation.  While elaborate decorations or themed desserts are not typically my preference, these confection flowers made for some of the loveliest cupcakes I had ever seen.  AND...they gave me an excuse to buy a bunch of candy so of course I was delighted. 

Angel Food Cupcakes with Candy Flowers {Pedantic Foodie}

Setting out, I was prepared for disaster.  On the few occasions that I have attempted to emulate Martha, my endeavors have rarely looked even remotely like the picture I was copying.  

Angel Food Cupcakes with Candy Flowers {Pedantic Foodie}

However, with this particular venture, the worst case only meant that I would be left with three dozen unadorned or very ugly angel food cupcakes, a bowl of fluffy frosting, and peach candies that would desperately need to be eaten by the handful.

Even the worst case seemed pretty wonderful. 

Angel Food Cupcakes with Candy Flowers {Pedantic Foodie}

Angel food cake is always my cake of choice.  My mother makes it for my birthday every year, and I especially love it in the Springtime.  

Angel Food Cupcakes with Candy Flowers {Pedantic Foodie}

I love watching egg whites become billowy white clouds.  

Angel Food Cupcakes with Candy Flowers {Pedantic Foodie}

The flour mixture is dusted over the egg whites in three increments before being folded into the whites. 

Angel Food Cupcakes with Candy Flowers {Pedantic Foodie}

While the cakes are cooling, you can get to work on the frosting.  

Angel Food Cupcakes with Candy Flowers {Pedantic Foodie}

While I normally would have paired angel food cake with a simple spoonful of whipped cream, these cupcakes seemed to beg for something a little more whimsical - like a fluffy, lemon-scented marshmallow frosting. 

Of course, you could exchange the lemon for a tiny bit of rose water if you would really like to play up the floral vibe, I just wasn't feeling it this time. 

Angel Food Cupcakes with Candy Flowers {Pedantic Foodie}

Sweet, airy, and fragrant with lemon - it's worth the seven straight minutes of tiresome beating. 

Angel Food Cupcakes with Candy Flowers {Pedantic Foodie}

Decorating is simple, though I'll warn you now that slicing those peach candies in half is not exactly an easy task, but at least you can snack along the way... 

Angel Food Cupcakes with Candy Flowers {Pedantic Foodie}

While my sour-leather roses left a lot to be desired, I was quite delighted by how the peach and "berry" flowers turned out.

No, they are not entirely perfect like Martha's, but that is just fine with me.  

Angel Food Cupcakes with Candy Flowers {Pedantic Foodie}

I hear there's a holiday for mothers coming up, and mother's typically like flowers so...  Just a thought. 

Angel Food Cupcakes with Candy Flowers {Pedantic Foodie}

Sincerely, 

Pedantic Foodie


Floral Cupcakes - Angel Food + Lemon Marshmallow Frosting

recipes adapted from Ina Garten and Paula Deen / makes about 36 cupcakes

for the cupcakes

- 2 cup granulated sugar, divided 

- 1 1/3 cups sifted cake flour 

- 1 1/2 cups egg whites (about 10-12 large eggs)

- 1/2 teaspoon kosher salt 

- 1 1/2 teaspoons cream of tartar 

- 1 teaspoon vanilla extract 

- 36 foil cupcake liners


Line several muffin tins with foil cupcake cups and preheat oven to 350 degrees. 

Combine flour and 1/2 cup granulated sugar and sift together four times.  Set aside. 

In the work bowl of your stand mixer, combine egg whites, salt, and cream of tartar.  Beat on high speed until medium peaks form - about one minute.  Reduce speed to medium and slowly sprinkle in 1 1/2 cups granulated sugar.

Increase the speed to high and whisk for 3-5 minutes more, until the whites are very thick and shiny and hold firm peaks.  In the last minute of beating, add vanilla extract.  

Sift 1/4 of the flour mixture over the egg whites and fold it in gently.  Continue adding the flour mixture in fourths until it is fully incorporated.  

Scoop the batter into the prepared muffin tins and bake for 20-25 minutes, or until the tops are crisp and deep golden.*  

Remove the cakes from the oven and place on cooling racks.  While the cakes are cooling, prepare the marshmallow frosting. 

*Though the cakes may be cooked through, pulling them out too soon will results in a dense cake.  Make sure you allow the cakes to brown fully.  

for the lemon marshmallow frosting

 - 1 1/2 cups granulated sugar 

- 1/4 teaspoon cream of tartar

- 1/8 teaspoon kosher salt 

- 1/3 cup water 

- 2 egg whites 

- 1 teaspoon vanilla extract 

- zest of one lemon

Fill a heavy saucepan 3/4 full of water and place over high heat.  Bring to a heavy simmer. 

Combine sugar, cream of tartar, salt, water, and egg whites in a glass bowl that is just slightly larger than the saucepan and that will easily rest over the pan when set on top.  Beat the mixture with an electric hand mixer for one minute.  The mixture should look somewhat frothy.  

Place the glass bowl over the pan of simmering water, being careful that the water is not touching the bottom of the bowl - this could cause the frosting to turn to sugar. 

Beat the mixture on high speed with your electric hand mixer for seven minutes.  The mixer should be very thick and shiny.  Remove the bowl from the saucepan and beat in vanilla and lemon zest.  

Use the frosting immediately on cooled cupcakes. 

decorating and assembly

- peach candies, sliced in half 

- raspberry and blackberry candies

- literally whatever else you find appealing, except black licorice (ew)  

Use a butter knife to coat each cupcake with a generous amount of frosting and then decorate with your prepared candies to create whimsical flowers.  Store in airtight containers or serve immediately.  Enjoy! 


You may also like...

Strawberry Mint Limeade

What a week it has been.  I have needed to step back, take a couple of deep breaths, and set aside the soundtrack of stress that my brain so loves to play on repeat.  

Strawberry Mint Limeade {Pedantic Foodie}

If you have noticed my vacancy on social media lately, I’ll be back with more coffee and flower pictures soon.  I just needed a quick breather.

I'm making "To-Read" lists, trying to decide if I really want to buy a bathing suit, and drying tears - mostly my own. 

Strawberry Mint Limeade {Pedantic Foodie}

I hope you're planning picnics, farmer’s market trips, and decadent hours of relaxing with your favorite people. 

Strawberry Mint Limeade {Pedantic Foodie}

For now, let’s make a batch of something sweet, tart, and slightly herbaceous. 

Strawberry Mint Limeade {Pedantic Foodie}

I am smitten with this color palette.  When I was five years old my favorite color was chartreuse and I still get a little jolt of delight every time I have an excuse to juice limes.  Their natural ombre power makes my eyes happy. 

We begin by infusing a pitcher of water with sweet, sliced strawberries.  In just an hour this water will be pink and fragrant with strawberry flavor.  Did I mention it would be pink?  YAY! 

Strawberry Mint Limeade {Pedantic Foodie}

While our strawberries are steeping, we prepare a sweet, mint syrup.  I love the combination of mint and lime.  Last year, I made this Blackberry Mint Limeade and it’s still a favorite. 

Strawberry Mint Limeade {Pedantic Foodie}

Freshly torn mint is pressed into granulated sugar with the tines of a fork.  This will release the oils and help us capture all of that fresh, minty flavor in our syrup. 

Strawberry Mint Limeade {Pedantic Foodie}

The subtle minty notes in this syrup will become more and more apparent as it cools. 

Strawberry Mint Limeade {Pedantic Foodie}

After juicing limes by hand for years, I am now convinced that a reamer is a kitchen essential.  It's a small luxury that you will thank yourself for buying every time you have to juice a big basket of citrus fruits. 

Strawberry Mint Limeade {Pedantic Foodie}

Gold straws are another luxury, far less practical, but nonetheless beguiling. 

Strawberry Mint Limeade {Pedantic Foodie}

Can I take a moment to say how much I looooove my new fish pitcher? My fiancé hates it and we spent a good fifteen minutes in the middle of Target, kindly discussing why I should/should not buy it… and then we walked away with my new found treasure in hand. 

Strawberry Mint Limeade {Pedantic Foodie}

This limeade is best after it has sat for a few hours and the flavors have had a chance to meld.  

Strawberry Mint Limeade {Pedantic Foodie}

These Spring days have been such a delight.  Though the strain of life does not diminish, its touch is less lasting.  

Strawberry Mint Limeade {Pedantic Foodie}

The cool morning air reminds me of the promise of new beginnings. 

Strawberry Mint Limeade {Pedantic Foodie}

Give yourself a break this weekend, if only for a few moments. 

Happy Friday, dear friends!

Sincerely, 

Pedantic Foodie


Strawberry Mint Limeade

makes about 2 quarts

- 6 1/2 cups filtered water, divided 

- 1 1/2 cups fresh strawberries, sliced 

- 1 1/8 cups granulated sugar 

- 1/2 cup fresh mint, roughly chopped

- 1 cup freshly squeezed lime juice 

- lime wedges, for garnish

Combine six cups water with sliced strawberries in a large pitcher.  Cover and refrigerate for one hour.  While the strawberries are steeping, prepare the mint syrup. 

In a medium bowl, combine sugar and fresh mint.  Use the tines of a fork to press the mint into the sugar.  

Place sugar and remaining 1/2 cup of water in a small saucepan and place over medium heat.  Stir often, until the sugar has dissolved and the syrup has begun to simmer.  Simmer for 2-3 minutes, until the syrup has thickened slightly, and then remove from heat and allow to cool.  

Combine lime juice and mint syrup with the strawberry water.  At this point, you can refrigerate until ready to serve.  The longer the limeade sits, the more apparent the subtle flavors will become.*  

Serve over ice and garnish with fresh lime wedges.  Enjoy! 

*I liked this limeade best after it had sat overnight.  However, you will probably not want to keep it past two days, because the strawberry slices will become soggy and discolored.